
How to Remove PUP DNS Keeper and Solve the Infection Brought to Browser Chrome/IE/Mozilla?
Brief description of DNS Keeper
DNS Keeper is another annoying potentially
unwanted program that one would actually want to have in the system. This PUP
displays ads stating that
Showing up ads to users about obtaining
access to blocked websites as well as digital media. This would sound
attempting to users who are curious enough to enter mysteriously locked
websites. Though the outcome would be a running-slow computer and loads of junk
files in the system.
What does DNS Keeper do to your browser and system?
To browser:
After it is installed in your computer,
there will be loads of ads appearing and flowing on webpages with various
information but all disturbing in the same way. Other than that, extra extensions
that come with DNS Keeper drag the browsing speed down. Browsers crash
constantly due to this cause.
To computer system:
System has delayed response. The screen
freezes all the time and some programs can’t start at all, or are forced to stop
during the process.
How does adware DNS Keeper manage to get into the system?
- It is bundled with third party software on websites that are maliciously designed.
- It is attached on mal-ads.
- It is sent inside the spam as an attachment or an address.
- It comes with other infected removable drives (such as USB) on or Internet-shared files.
How to get rid of DNS Keeper?
Following are two guides for your reference
on how to delete DNS Keeper: Instruction 1 and Instruction 2. If you don’t want
to bother searching all the over the Internet and looking for removal solutions
every time your computer gets attack by new malware or virus, you can go with
Instruction 2.
1. End related programs from Task Manger.
Press “Ctrl + Shift + Esc” at the same time
to open Task Manager, select Processed, find DNS Keeper extensions, then click
End process.
2. Delete DNS Keeper extension from
Control Panel.
Click Start menu, choose Control Panel and select Uninstall a program. Find DNS Keeper extension and remove it.
3. Remove DNS Keeper extensions from
browsers.
Internet Explore:
1. Start IE and select Tools on the right
corner, choose Manage add-ons.
2. Select Toolbars and Extensions then find
and remove DNS Keeper.
From Google Chrome:
1. Start Google Chrome and select Customize
and control Google Chrome on the right corner, choose More tools.
2. Select Extensions, find DNS Keeper extensions and click the trash bin icon to delete it.
From Mozilla Firefox:
1. Start Mozilla Firefox and choose Tools also
at the right corner, click Manage add-ons and then Extensions.
2. Disable related extension.
4. Clear browser history
5. Delete possibly corrupt registry keys:
From
Internet Explore:
1. Click
Tools then Internet option.
2.
Find General and select Delete.
3. Select “Temporary Internet files and
website files” “Cookies and website date” “History”, then click Delete.
From Google Chrome:
1. Click Customize and control Google
Chrome then More tools.
2. Select “
From Mozilla Firefox:
1. Click Tools, then Option.
2. Find Privacy, and select “Clear recent
history” and “remove individual cookies”. Then click OK.
5. Delete possibly corrupt registry keys:
HKEY_CURRENT_USER\Software\Microsoft\Windows\CurrentVersion\Run\
HKEY_CURRENT_USER\Software\Microsoft\Windows\CurrentVersion\InternetSettings
“CertificateRevocation” = 0
HKEY_CURRENT_USER\Software\Microsoft\Windows\CurrentVersion\Policies\System
“DisableTaskMgr” = 1
HKEY_LOCAL_MACHINE\SOFTWARE\Microsoft\Windows\CurrentVersion\policies\system
“DisableTaskMgr” = 1
6: Download RegCure Pro for better
optimization for your computer. (highly suggested but not mandatorily)
1: Click below to download RegCure Pro
immediately.

2: Click "Yes", and allow the computer to download RegCure Pro.
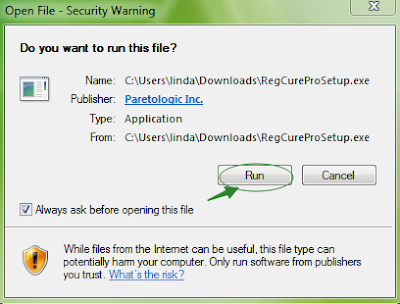
3: After successfully download the installer, double click the icon to run RegCure Pro. Choose “Next” and go on installing.

4: Once you finish the installation
process, click “System Scan” to start the scanning process.
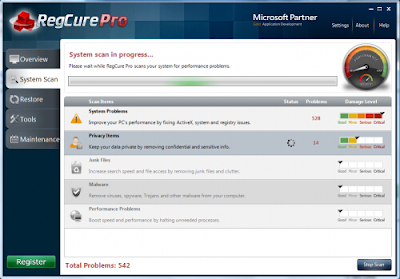
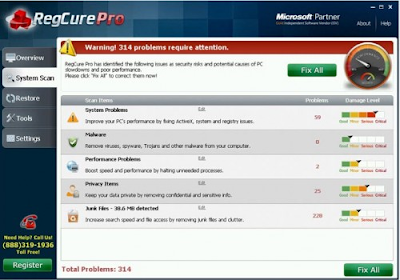
5: After the RegCure Pro done scanning all
the files, click “Fix All” to complete the whole scanning process.
Part 2 -- Automatical Removal Instructions
Step 1: Click the icon below to download
SpyHunter.

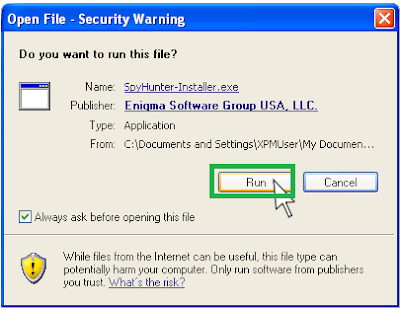
Step 2: Click “Run” to download SpyHunter
installer.
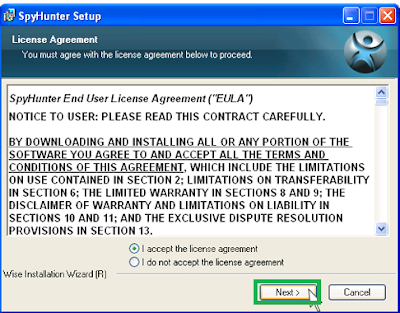
Step 3: After finish downloading it,
start installing SpyHunter. Click “Next ” continue installation.
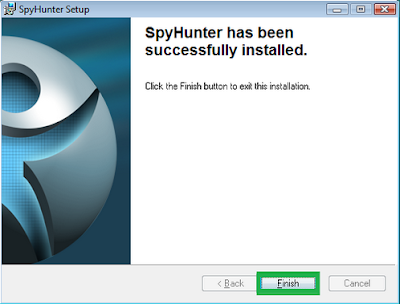
Step 4: Click “Finish” to complete
installation.
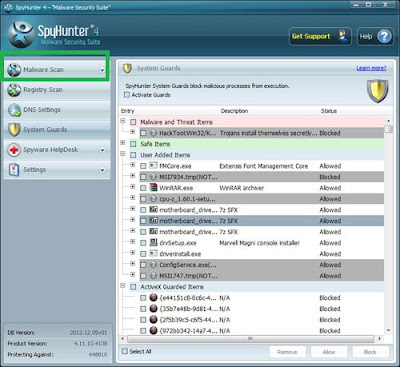
Step 5: Click “Malware Scan”.
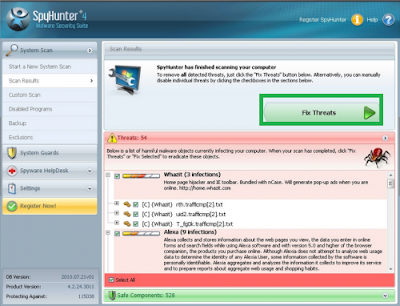
Step 6: Click “Fix Threats”.
Click here and download SpyHunter quick and safe.

No comments:
Post a Comment